Agentic Research Workflow Notes
My personal recommendations on how to effectively use agentic workflows for scientific research in a responsible way, July 2026.
Introduction
Agentic workflows can significantly speed up your research. The problem is that, at this point in time, AI models are not reliable enough to operate securely or autonomously. Remember the following words:
Don't treat AI responses as evidence,
rather use it as an assistant to manage evidence you verify.
In the following, I provide personal recommendations on how to set up guardrails and conveniences so the agent can work more effectively and give you an easier workflow. It's a suggestion based on experience, and by no means optimal.
Basic Environment Setup
The idea is to use a coding IDE such as Visual Studio Code (or similar) as the environment for an AI research assistant, with a file structure optimized for this task. We will use AGENTS.md & index.md files, a knowledge folder, a sources folder, and a workbench folder.
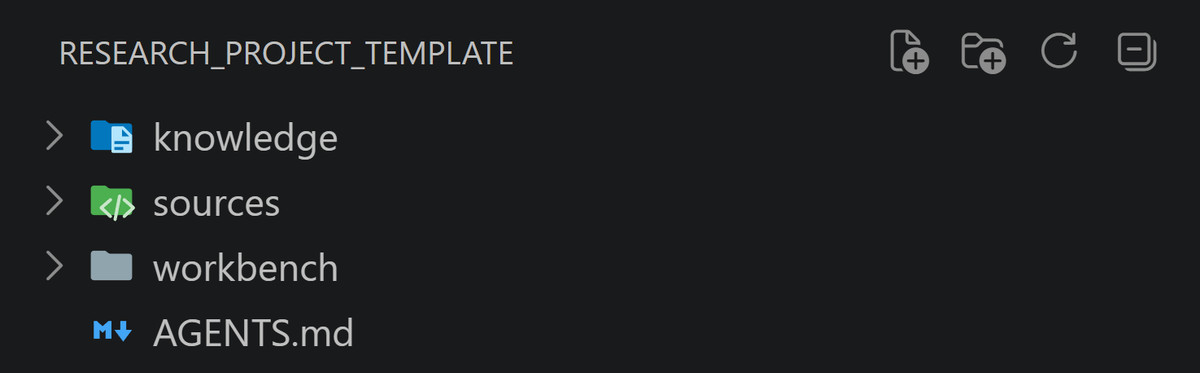
All you now need is access to an agentic coding assistant such as Claude Code or GitHub Copilot. Other setups (OpenCode Go, Codex, Cursor, etc.) work similarly, with only minor differences in most cases.
Details on agent setups
- GitHub Copilot comes built into VS Code by default.
- Claude Code requires installing the VS Code Claude Code extension to open a chat.
- OpenCode Go requires adding your provider's API key to your VS Code environment. This is a really cost-efficient choice.
- OpenAI Codex requires installing the VS Code Codex extension.
- Just to be sure: free options are scarce and you would not get far with them.
AGENTS.md
The instructions your research assistant reads at the start of every chat.
Carefully select only the most essential information your agent needs every session. Don't dump everything in. That dilutes context quality, and real instructions get ignored. Keep it short. Here are some things to cover:
- The agent role
- A basic description of a research assistant.
- Your project context
- Describe the research topic, objective, and target venue.
- Persistent rules
- Something that must apply to every chat.
- Infrastructure information
- Short description of where everything is located.
- Instruct the agent to keep this section updated whenever the infrastructure changes.
For example, an AGENTS.md could contain the following:
- This is a research project about ___.
- You are a scientific assistant.
- You act professionally and rigorously.
- You speak from sources and avoid speaking from your own knowledge.
- Your answers are precise and to the point.
- You only do what you have been told to do.
- Rules:
- You download sources whenever possible, store them in the sources folder, convert them to Markdown, and index the content into the knowledge folder for future reference.
- When asked to store knowledge, store it in the knowledge folder in the appropriate .md files.
- At the end of every task, report cleanly what you did. Name the files you changed, give the commands you ran, and say plainly what you did not do or could not verify.
- Never use em dashes.
- Where to find what:
- The knowledge folder contains all the memories and indexes to the sources as well as previous insights.
- The sources folder contains all the source material. Prioritize and expand it whenever appropriate.
- The workbench folder contains everything else, and is where experiments are performed.
- Each of these three folders contains an index.md that serves as its table of contents. Read it first, before doing anything else in that folder, and update it whenever that folder changes.
Important note on Claude Code.
Claude Code reads CLAUDE.md, not AGENTS.md.
- The template already handles this. Next to every AGENTS.md there is a CLAUDE.md holding the single line @AGENTS.md, Anthropic's documented import syntax, so Claude reads the full file and there is nothing to keep in sync.
- Only using Claude Code? Then you can delete the AGENTS.md files and write everything directly into the CLAUDE.md files instead.
- Never use Claude Code? Then you can delete the CLAUDE.md files.
The knowledge Folder
The growing memory of your research assistant.
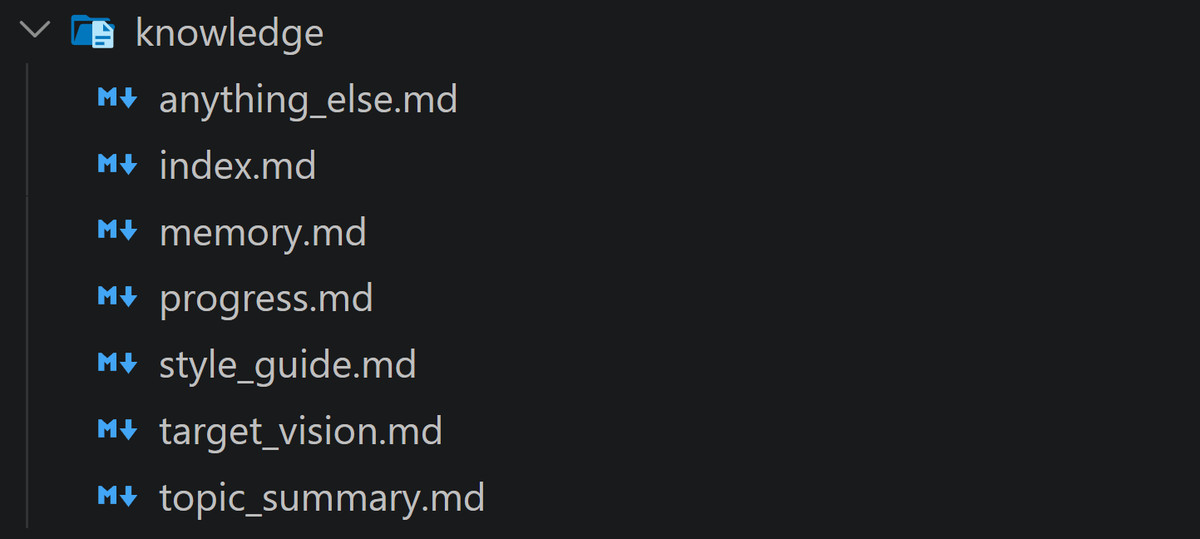
- Contains various .md files that capture ideas, summaries and various memories.
- It provides session independence. You should be able to open a new chat and continue where you left off regularly.
- Examples:
- index.md: the first anchor in this folder. It explains what is where, and any change elsewhere should cause this file to be updated.
- memory.md: A place to remember things you want to be remembered.
- progress.md: for logging what has been done and observed.
- target_vision.md: a deeper explanation of what you want from this project.
- style_guide.md: Specifications for plotting, tables, writing style.
- topic_summary.md: for example, a condensation of a topic from the sources into an overview, or a summary of observations from your sessions.
- anything_else.md: Get creative! You can ask the agent to create new .md files while working with it.
The sources Folder
The library your research assistant assembles.
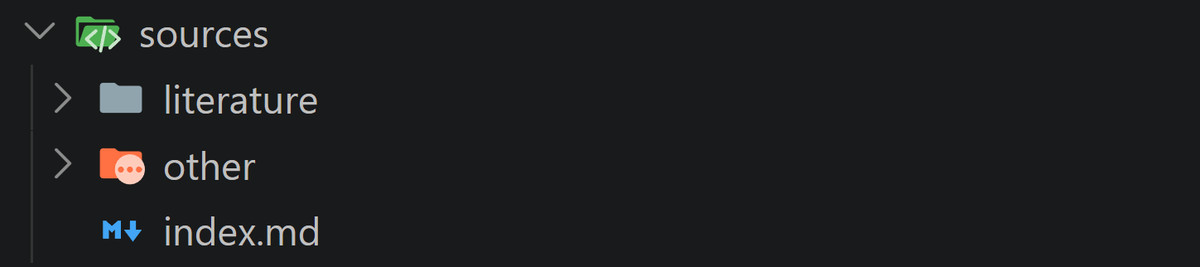
- It also contains an index.md that serves as a registry of all the sources.
- A literature folder for academic sources.
- An other folder for non-academic sources such as web pages, videos, etc.
- Important note on PDF parsing ⚠️
- By default, agents either use screenshots or simple parsing that can miss content such as formulas.
- You need to establish that the agent converts PDFs into .md files first.
- Don't rely on the quickest solution either, such as pdfplumber, as it too has issues with formulas. Rely on MinerU to convert PDFs to Markdown. It's slower but more reliable. You can delete the PDF after conversion, and the images are preserved too.
- Establish that the agent should always do this automatically in the AGENTS.md.
- Ask your agent to install and test MinerU.
- You don't have to manually do the conversion when you add new literature. You can always ask the agent to do it for you.
- Be aware that MinerU can take a few minutes per PDF.
Details on parsing PDFs.
MinerU is the PDF parser I currently recommend.
The workbench Folder
The working directory for you and your research assistant.
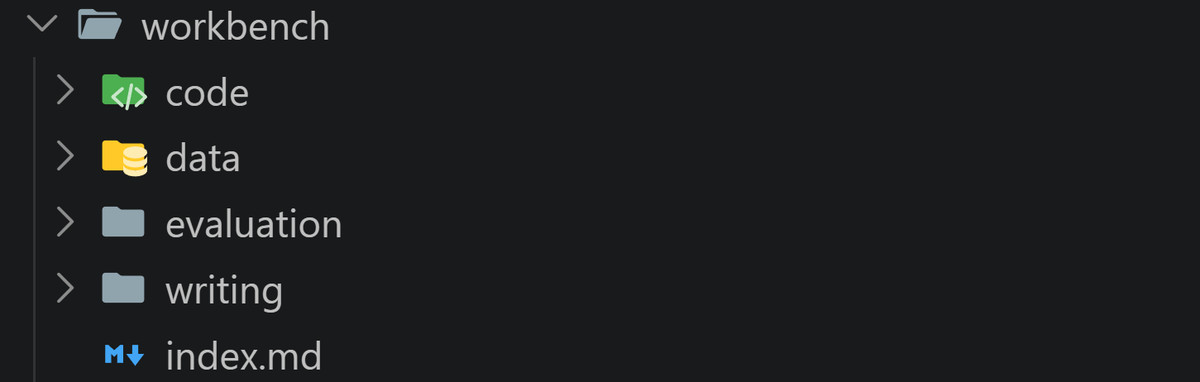
- It contains another index.md explaining what happens where.
- Your preferred folder structure for your workflow.
- Example folders:
- data: datasets you ask to be downloaded.
- code: implementations and plot generation.
- evaluation: results, output data.
- writing: drafts of manuscripts or reports.
Getting Started
Follow these steps to set up your AI research assistant.
- Folder setup:
- Download the template as a .zip and drop it wherever you want to work from.
- Rename the folder to something more relevant to your work.
- Go to VS code and open that folder.
- Agent setup:
- Have a clear vision of what you want to do.
- Edit the AGENTS.md files yourself to check if it fits your workflow.
- Start the agent:
- Open an Agentic chat.
- Get started!
- Example:
- Mention an academic work you'd like to start the literature search with. Ask the agent to download the PDF and its citations into the sources folder, then convert them to Markdown. Wait for this to finish.
- Ask it to survey the sources on a specific question, report its findings to you
- Ask the agent to condense the insights into the knowledge folder.
- Ask for an implementation in the workbench, run it, and report back to you. This could be an algorithm, a dataset, or an analysis rendered into plots, etc.
- Whatever you want to change in this workflow environment, just ask the agent to adjust it to your needs.
Safety Tips
A reminder that this workflow is not perfect.
- Be suspicious of your agent's work.
- Don't trust your agent.
- If you can write tests to evaluate a result, make that a habit.
- Verify the logic and sources of essential claims yourself.
- You can use agents to check on each other. Make use of that.
- Every once in a while, ask for an audit that critically and honestly reverifies the claims, sources, and results.
Bonus: The Research Manager 🧠
Set up an environment that oversees multiple projects at the same time.
- Place multiple of the above research folders next to each other.
- Then you have a top AGENTS.md, overseeing all projects. It:
- Carries only rules that apply for all project
- An index what the project folders are about.
- Makes sure that each project's individual AGENTS.md is read when dealing with it.
- Inside each project folder, nothing changes.
- Each project folder keeps its own AGENTS.md.
- The knowledge, sources and workbench folders are exactly as described above.
- When starting a new chat, tell the agent which projects to focus on.
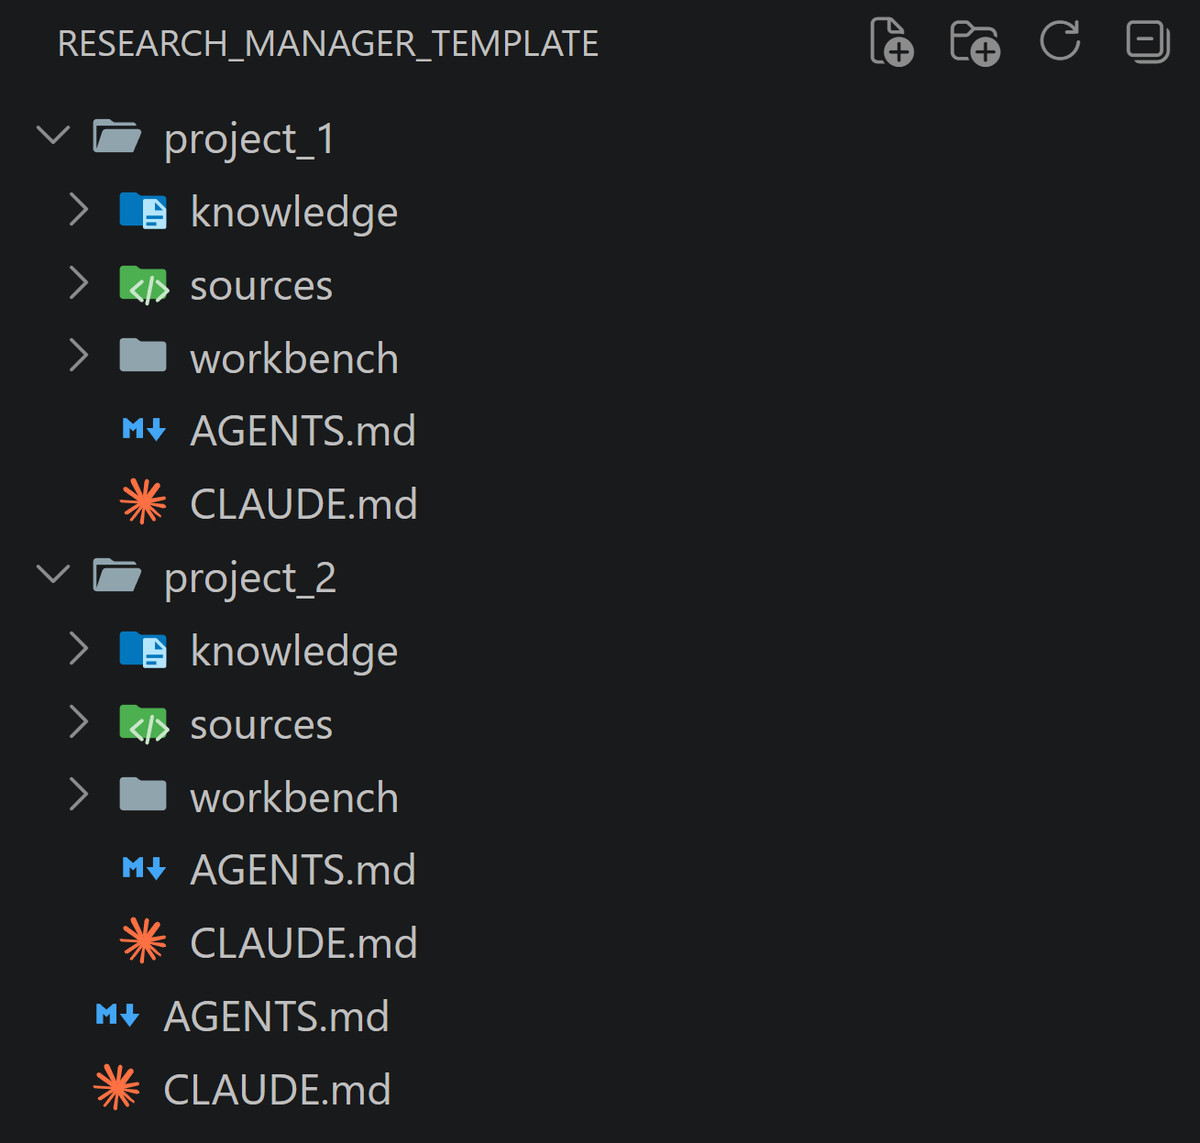
You can download the research manager template as a .zip too.
Downloads
Downloadable ZIPs to get started.
BibTeX
@misc{padilla_agentic_research_workflow_notes,
    author = {Marcel Padilla},
    title = {Agentic Research Workflow Notes},
    year = {2026},
    url = {https://marcelpadilla.com/Projects/Research_with_Agents/},
}